Natural slate flooring in bathroom

Tiling a shower can be quite a challenging procedure if you’ve never done it before, though it shouldn’t stop you from integrating your own specifically chosen natural stone tiles into your bathroom.  Here are some of the tools and materials that you’ll need to start the job:

  • Grout
  • Rubber Float
  • Tile Spacer
  • Sponge
  • Haze Remover
  • Silicone Caulk
  • Trowel
  • Tiles
  • Mortar

With all of these products equipped, you can start focusing on the job itself. Here are some useful tips to follow during the tiling process that will help you get started.

Tip 1 – Strip Shower Area Before Starting

Make sure you’ve stripped the entire space down to just the floor plan, so that’s the ceiling hardware and the walls. It can be challenging to do this and you might be worried about the whole demolition process, so seek professional advice if needs be.

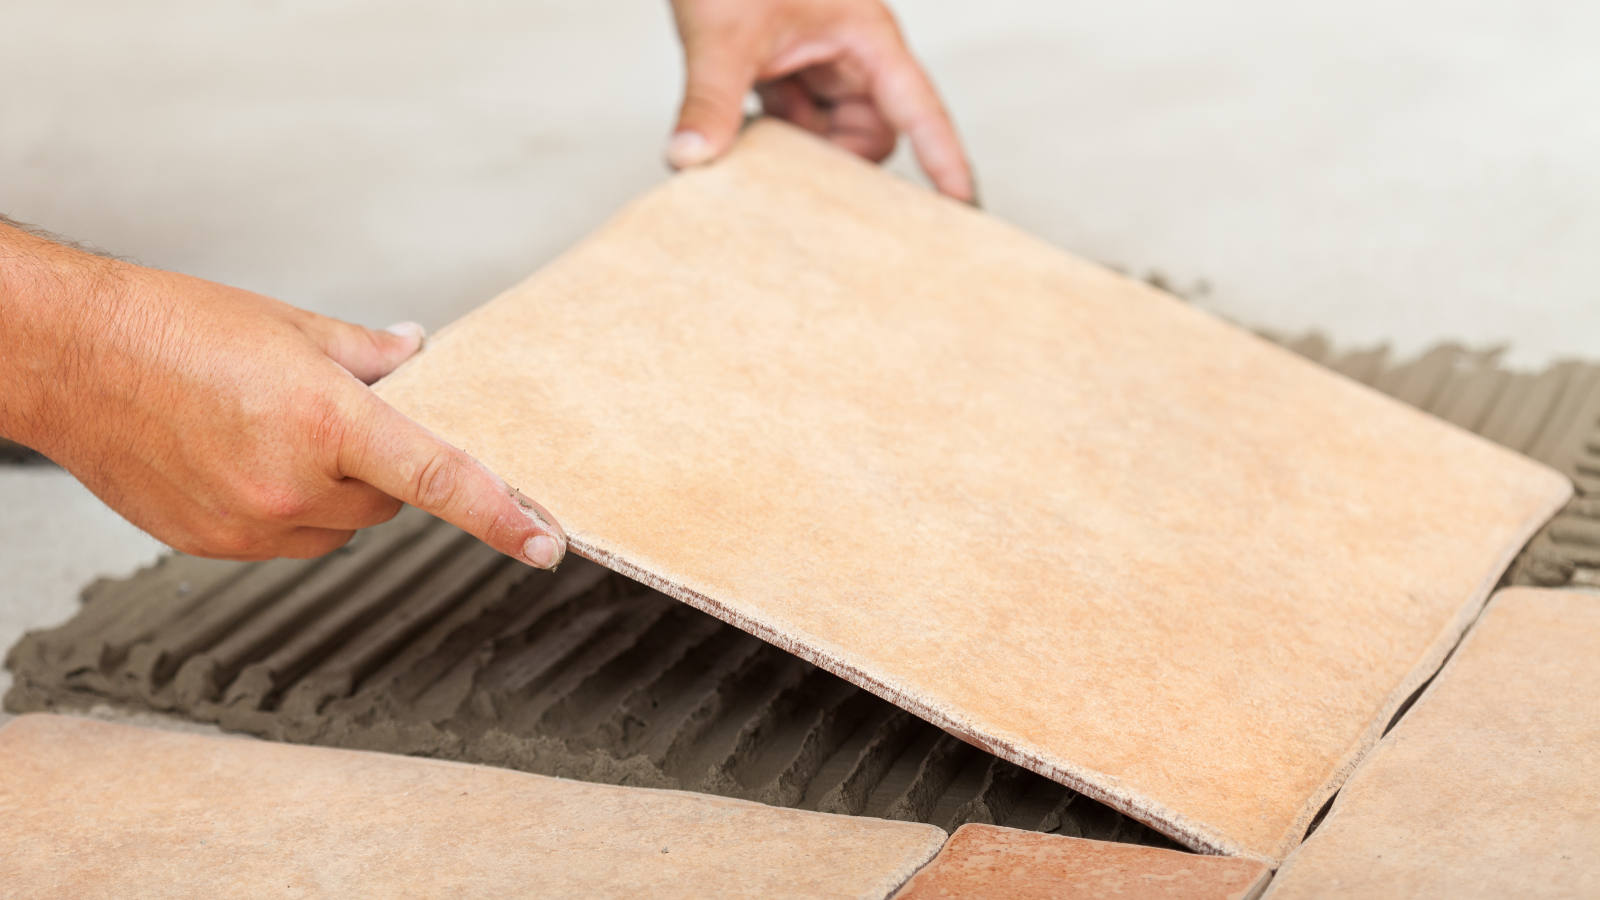
Tip 2 – Marking Out the First Row & Mortar

Use a pencil to mark out where your first row of tiles will be going. Make sure the bottom edge of the tiles isn’t directly touching the surface of the cement board. Try and leave a couple of centimetres between the two. The best mortar to purchase is definitely the premixed option, as the powdered option can be quite difficult to mix yourself.

Tip 3 – Leave Some Time Before Tiling the Rest

Leave around 8-12 hours before continuing with the tiling after the first row. This is so that you’ve got a solidified platform of tiles for the rest to sit on. Al the other rows going upwards from this point will rely on the bottom row, so we advise you not to take any chances here!

Archerfield Limestone Tile Floor In Cosy Seating Area

We thought it would be a good idea to remind you of some of the benefits of having natural stone tiles as part of your interior design plan, especially as the summer holidays often go hand in hand with various household construction projects. If you’ve considered making the most of our vast natural stone range here at the Stone Tile Emporium for parts of your property, here are some of the reasons why it’s such a popular alternative to other forms of flooring.

Appearance

Artisans - Kit Stone Clifton

Stone Tiles offer a wide variety of different styles and finishes and promote a unique elegance and luxury which can’t be replicated by any other type of tiling or flooring. Stone tiling is different every time, so you also know that no one else in the world has the style you’ve gone for! It is a classy, high quality alternative to carpets and wooden flooring, whilst it also has a historic demeanour with various fossils shaped over millions of years often still visible in the stone.

Maintenance

Tile fitting and installation services hero image

Stone Tiles need to be sealed before and after their installation. Once you do this, you don’t have to treat them again for up to two years.  They are extremely easy to look after and the sealing procedure isn’t as difficult as it sounds either.

Atmospheric

Porcelain tiles gallery image 1 - MUD_Bestone porcelain

Stone Tiles are great all year round as they can help cope with both the hotter and colder seasons. However, Stone Tiles create a sense of warmth wherever they are used, so during the winter with the addition of a warm, cosy fire, you’ll certainly feel a lot more comfortable surrounded by some beautiful stone tiles.

Marble Tiles Gallery Image - Original Style Earthworks Viano White polished marble and Nero Polished Marble

We’ve all experienced the ups and downs of carrying out DIY work and installing new stone flooring or wall tiling is probably one of the most common DIY jobs that you’ll come across. There are always questions that need answering when tiling, so we’ve decided to put together a few FAQ’s for those of you who are seeking out some helpful tiling advice or information. Three questions will be answered each week, so keep an eye on our blog over the coming weeks!

Q. Is it safe to drill through my bathroom tile installation?

A. Yes. However, it all comes down to what your tiles are made from. If they are thin and ceramic, a cheap drill bit is all you need to carry out the job. Porcelain tiles on the other hand require small diamond drill bits and can be much more difficult to start.

Q. Can tiles stick to plywood?

A. Plywood is quite a common bathroom material, though it must be thick enough to not be affected by regular changes in temperature. You will need a latex based bonding solution rather than standard PVA solutions to get tiles to stick to Plywood.

Q. Do I have to seal my natural stone tiling?

A. Yes. Natural stone isn’t porous so you’ll have to carry out a grouting procedure. Once the grout has been left to dry, it should become waterproof. Grouting doesn’t have a significant effect on the look of your natural stone tiles, so don’t worry too much about this.

Our tiling FAQ continues into week 2, where we focus on some of the more basic aspects of tiling for those who are carrying out their first ever stone tile project. Sometimes the most obvious questions bring about the most useful results!

Q. How do I work out exactly how many tiles I need?

A. To work out the exact number of tiles you need for your designated tiling space, multiply the height by the width of your wall space to get a measurement in square metres. Then find out the measurement of your chosen individual tiles and divide the surface area of your tiling space by that of your chosen tile.

Q. How can I get a neat and organised row of tiles?

A. It’s important to have tiles of equal size to have a perfectly symmetrical set of wall tiles. Place cut tiles of equal size at both ends of your row, using a spirit level to make sure you have them in line. After marking out the positions on the wall, use a batten to trial your row of tiles, putting spaces in between each one. Mark out the tile positions and gaps along the batten and use this as a gauge.

Q. How can I make sure the spaces between the tiles are even?

A. You can make the space between each tile even by putting plastic tile spacers between each one. Try to make sure that each spacer is pushed as far in as possible so they can also be grouted over. Try not to leave any marks on the tiling in the process.

We’re lucky enough to work in an industry here at the Stone Tile Emporium that provides us with all kinds of questions regarding the origin of natural stone and its characteristics.

It’s fascinating to learn more about the origin of natural stone, especially when you consider that the majority of stone flooring is the result of millions of years of compression beneath the earth’s surface.

For example, the colour in natural stone tiles derives from all kinds of organic matter and minerals. So how exactly does natural stone get its distinct colour and pattern variations?

The colour of natural stone is dependent on the minerals and organic matter present. For instance, red marble is given its colour from a high presence of iron, whilst green marble gets its colour from serpentine.

You can easily identify various minerals in natural stone by carrying out some research on the specific colours you get from all the different minerals present in stone. This can help you locate the perfect colour for your interior design plan.

So what should you know about minerals in order to maintain a tiles natural look? There are some stone tiles that gradually fade over time when exposed to sunlight, such as marble tiling.

Marble is sensitive to ultraviolet light and will subsequently lose its deep, shiny dark colour over time. You can bring the colour back by polishing or honing the stone every now and then.

If you’ve enjoyed a beautiful natural stone finish throughout your home for some time, whether it be marble stone flooring, slate cladding or limestone wall tiling, there comes a time for many where painting over walls helps to promote a newly introduced interior design scheme.

If you’ve got a similar predicament to deal with, you might be interested to learn about how you could paint over your currently installed stone tiles. There are plenty of natural stone tiles that can be painted over when given the correct treatment, so here’s a quick guide to painting your stone tiles.

Step 1 

The first thing to do is to sand over your tiling as this creates a rough surface that can be easily painted on.

Step 2

Once you’ve achieved a rough finish, you need to clean the wall with a thick scrub brush before making sure the wall is dry.

Step 3

Apply two separate coats of primer before sanding over the tiling so that you get rid of any imperfections. Apply the second coat only after the first has dried completely.

Step 4

Paint over the tiles with two separate layers using a foam roller. Continue to search for imperfections and sand over them if necessary.

Step 5

Your tiling should now be ready for paintwork, so pick your chosen colour preference and start decorating!

As we get closer to winter, the opportunities we get to start decorating the outdoors with natural stone start to decline. Instead, you might find yourself carrying out many more interior tiling jobs, whether it’s kitchens, bathrooms, table surfaces or floors.

There are plenty of tiling add-ons to seek out that will further improve your interior tiling jobs during the winter. For example, you might be wondering how you can further enhance the insulating properties of your tiles in preparation for the colder months.

Insulation Boards

This is what most people will turn to if they are keen to improve insulation throughout the property. When laying a natural slate flooring for instance, the insulation board helps to prevent heat loss and saves energy in the long run.

They are usually waterproof and can be used with both walls and floors. Insulation boards work by reflecting heat back up through the tile.

There are also a number of tiling finishes available on the market today that perfectly resemble the specific time of year, including wooden ceramic finishes. Another hugely popular tiling choice during the autumn and winter is slate, which offers durable porcelain material and low maintenance properties.

To learn more about our tiling range and tile fitting services here at the Stone Tile Emporium, call us today on 01737 201125. From tomorrow, you can visit our brand new shop in Bell Street, Reigate and explore our wide range of natural stone tiles and mosaics.

If you’ve just acquired some natural stone tiles and you’re wondering where to go next, it might help if you know exactly what it is you need to get the tiling process underway. Tiling might seem reasonably straightforward but there are a number of tools that can make the time-consuming process a whole lot easier. Here are 5 essential tiling tools that you should invest in if they aren’t already part of your toolbox collection.

  1. Start by getting hold of a grout float. These are essential if you want the job to be done neatly and efficiently. Use the grout float to press the mortar into the seams created between the tiles.
  2. A trowel is another essential tool that lets you spread the mortar for the tiles to be placed on. They are designed in a pointed fashion to ensure you get the right amount each time.
  3. You’ll need a mallet to tap the tiles into position. Just make sure you use a rubber mallet instead of a wooden one!
  4. If you’ve noticed a build-up of excess mortar on the top of the tiling, you can use the tough, resilient grout sponge to get rid of it.
  5. Finally, make sure you have a bucket to mix the mortar in. It needs to be new and ideally suited to making thinset mortar.

There you have it, 5 essential tiling tools. Make sure they’re available to you the next time you decide to purchase some tiles from us here at the Stone Tile Emporium!


The vast majority of patios take a beating throughout the winter months, so it’s important to make sure your limestone or other mosaic stone patio is restored to its finest condition before the summer. It’s easy to neglect patios as they are often covered in various plants and other garden accessories.

It turns out that cleaning your garden patio isn’t as hard as you probably thought, with plenty of products available online to get the job done effectively. Alternatively, you can have a go at other straightforward cleaning techniques that will have your patio looking in great shape for the summer.

It’s good to start by getting rid of pointless clutter as this can affect the room you have to start cleaning. If you’ve had various plants on your patio throughout the year, you’ll probably need to do a thorough sweep of the patio.

Depending on the type of natural stone your patio is, you can mix a cleaning solution like bleach with water and scrub with a tough outdoor brush to get rid of other stains. It’s also a good idea to get rid of the weeds growing between the stone beforehand if there are any.

Finish the cleaning process with a garden hose, getting rid of the bleach solution that’s remaining and leave it to dry overnight.

When we anticipate putting up a new range of tiles in the bathroom or kitchen, we don’t usually make grout a huge priority. However, grout can have more of an effect on the appearance of your tiles than you’d probably think, so here are some of the best grouting methods you can use when assembling your natural stone tile designs.

If you’re looking for something reasonably neat and simplistic, you’re probably better off going for matching grout. This can really improve the overall finish, so it’s ideal if you don’t want the tiles to look ragged or stand out too much. The grout colour doesn’t have to be identical, though it shouldn’t stand out as much as the primary colour of your tiles.

If you’re thinking of doing the opposite to matching grout, you’ll probably favour contrasting grout. You’ll need to find a grout colour that suits your chosen tiles, whilst it may not be overly necessary if you’ve already got an attractive, natural finish. However, coloured grout works well if you want to hide dirt accumulation.

If you want something a bit more advanced for your porcelain tiles, such as accent grout for instance, you might want to choose a colour that fits the overall style and theme of the entire room. Once you’ve chosen a specific colour scheme it can be difficult to change it, especially when you use accent grout, so keep this in mind when choosing this option.

Get a Quote

Contact Us

Please get in touch using the form below

"*" indicates required fields

Download our natural stone tile guideClick Here